J2 Assembly
1
LOCATE PRINTED MATERIALS
Inside the chamber set box you will find a “Start here” envelope with all the printed materials which includes the manual and quick start guide. Now that you’re familiar with each part and what they’re called, we can assemble the juicer.
2
COMBINE SPINNING
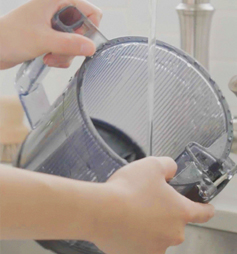
BRUSH, JUICE STRAINER, AND AUGER.
First, combine the spinning brush, juice strainer, and auger. Insert the strainer into the spinning brush, and then insert the auger into the strainer.
3
PLACING THE STRAINER INTO THE CHAMBER
You will notice two wings on the strainer. One large and one small. Firmly place the strainer set into the chamber by locating the corresponding large and small cutouts. Push down until the top of the auger is sitting flush with the top of the strainer.
4
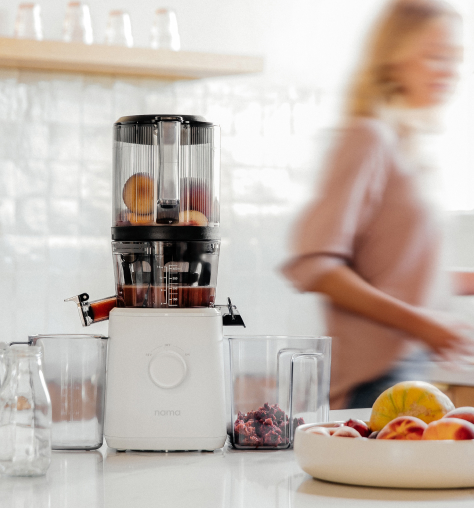
ASSEMBLING THE HOPPER
Place the hopper onto the chamber by aligning the guide mark on the hopper with the unlock symbol on the chamber. Next, rotate the hopper clockwise until the guide mark is in line with the Lock symbol. Holding the handle, place the chamber set onto the base with the handle in front.
TIP: ASSEMBLING WHILE NOT ON BASE
The chamber set must be assembled first before placing onto the base. After juicing, make sure to remove the entire chamber set from the base before disassembling.
TIP: UNLOCKING AND REMOVING HOPPER LID
Squeeze the release tab to unlock the hopper lid. The hopper lid can be removed by lifting straight up. To reconnect, press down firmly until it clicks into place.
Note: if the hopper lid is not closed, the juicer will not turn on.
5
PLUG IN THE POWER CORD
Insert the power cord into the back of the base. Then plug it into your power outlet
6
TURN ON YOUR JUICER
It is normal to hear the juicer clicking into place.
Note: if the juicer does not turn on, please check that the chamber set is assembled correctly and the guide-mark is in the LOCKED position, and make sure that the hopper lid is closed.